Open source computer vision library abbreviated as openCV is developed by Intel. It is open source and free for use. It contains so many powerful and efficient functions and algorithms regarding image processing. In last few years openCV becomes very much popular among developers. Mostly people involving in image processing sector are using Matlab while embedded developer are love to use openCV.
Recently openCV community has announced that latest version of openCV now support JAVA as well. So all devices which run on JAVA like android are compatible to run and process code which contains openCV library functions. Right now i am not going to discuss about JAVA and openCV.
In windows environment openCV can be integrated with Microsoft visual studio and developer can use Microsoft visual C++ to develop code for image processing. While searching on internet you might have found that to install or use openCV library in Windows environment you required CMAK to build openCV library but the fact is CMAKE is not required for installing openCV in Windows. openCV pack itself contains the necessary build files for Windows.
So to install openCV library or to use openCV functions in Windows environment all you need to do is simple setting in your system and host IDE that is Visual Studio for Windows.
For clean and perfect installation follow the given step as it is including folder name, folder path and in short everything.
For clean and perfect installation follow the given step as it is including folder name, folder path and in short everything.
Step-1: Downloading and extracting openCV
You can download openCV library from below given link. Select openCV for windows and download. Here i am using openCV version 2.4.3 so this procedure is applicable to openCV2.4.3 with no modification in steps. If you are using different version and facing any difficulty in installation then feel free to do comment i will try to solve it.
openCV
Now save it in your drive. It will look like..
This is self-extracting compressed file, now double click on it and when it ask for path to extract enterC: which is for C drive. You can select any other drive but then you have to do some necessary changes because here i am going to configure openCV for C drive only.
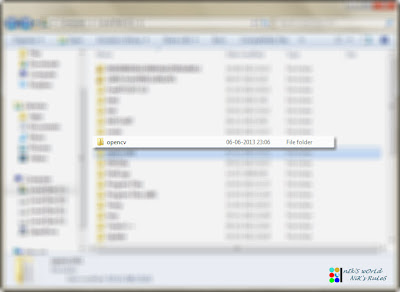
Now in C drive you will find a folder named "opencv". This folder contains all header files, library files, dll files. Now to use all functions defined inside this files we need to set up a path for dll and library files in our IDE that is Microsoft visual studio.
Step-2 : Configuring system environment variables
1. Open Run using win+r key and type "sysdm.cpl" hit enter.
2. It will open System Properties. Click on Advanced tab and in advanced tab again click on "Environment Variables"
3. It will open Environment Variable window. Here you will find two types if variables. Click on Newbutton below System variables.
4. Now it will take to you in Edit System Variable where two fields are required to be field. Enter following values in those two fields.
- Variable name : OPENCV_INSTALL
- Variable value : C:\opencv\build\x86\vc10
Click on OK button
5. Now its time to set path for a binary files. So in a frame of System Variables there is one predefined variable named Path. Click on it and hit Edit button.
6. Now again it will take to you in Edit System Variable. Here do not write anything insideVariable name. In Variable value field you will find some pre-defined values, do not change them. Enter ;%OPENCV_INSTALL%\bin. Final summary is...
- Variable name : Do not change anything
- Variable value : ;%OPENCV_INSTALL%\bin
If there is already semicolon is present then avoid to insert it.
Click on OK button. So we are done with configuring system variables. Now click on OK inEnvironment Variables window and then in System Properties windows click on Apply and thenOK.
3. Configuring Microsoft Visual Studio 2010
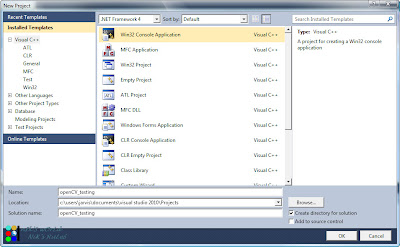
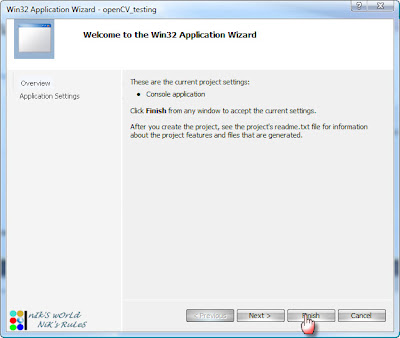
1. Create a new project in Microsoft Visual C++ with Win32 Console Application. In Win32 Application Wizard click on Finish.
2. Now click on Property Manager and insert New Property Sheet named Release_PS
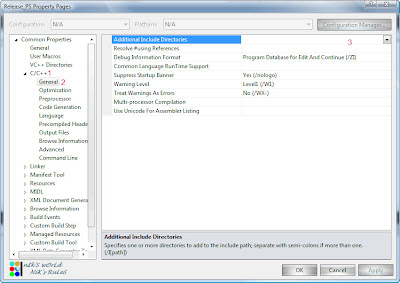
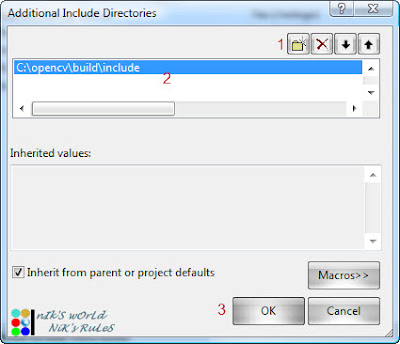
3. Double click on Release_PS. Expand Common Properties and in it also expand C/C++. Now click on Genral and here edit Additional Include Directories with path C:\opencv\build\include
4. Now expand Linker and select General. Now select "Additional Library Directories" and inside it write $(OPENCV_INSTALL)\lib
5. Again inside Linker select Input. Here in Additional Dependencies you need to insert library files given in C:\opencv\build\x86\vc10\lib and C:\opencv\build\x86\vc10\staticlib.
There is two types of library files contained by this folders among which one's name end with latter 'd'for an example two library file for xyz are xyz.lib and xyzd.lib
So make sure that when you are adding library files in release property sheet, you only add files without latter 'd'. You have to add required files manually as per your need from path metioned above. Some commanly used library files are given below.
opencv_calib3d243.lib
opencv_contrib243.lib
opencv_core243.lib
opencv_features2d243.lib
opencv_flann243.lib
opencv_gpu243.lib
opencv_haartraining_engine.lib
opencv_highgui243.lib
opencv_imgproc243.lib
opencv_legacy243.lib
opencv_ml243.lib
opencv_nonfree243.lib
opencv_objdetect243.lib
opencv_photo243.lib
opencv_stitching243.lib
opencv_ts243.lib
opencv_video243.lib
opencv_videostab243.lib
6. Now we are going to add one more property sheet. Follow step 2 to 4 same as above with only difference is property sheet name would be DEBUG_PS
7. Again add library files in this new property sheet DEBUG_PS under Linker >> Input >> Additional Library Directories. Here add library files which end with latter 'd' from same pathC:\opencv\build\x86\vc10\lib and C:\opencv\build\x86\vc10\staticlib. Some commonly used library files are given below.
opencv_calib3d243d.lib
opencv_contrib243d.lib
opencv_core243d.lib
opencv_features2d243d.lib
opencv_flann243d.lib
opencv_gpu243d.lib
opencv_haartraining_engined.lib
opencv_highgui243d.lib
opencv_imgproc243d.lib
opencv_legacy243d.lib
opencv_ml243d.lib
opencv_nonfree243d.lib
opencv_objdetect243d.lib
opencv_photo243d.lib
opencv_stitching243d.lib
opencv_ts243d.lib
opencv_video243d.lib
opencv_videostab243d.lib
So that's it..you have done..
Lets check whether it is working or not..Copy and paste code given below in your file and run it..
1
2
3
4
5
6
7
8
9
10
11
12
13
14
15
| #include#includeusing namespace cv;int main(int argc, char** argv[]){ IplImage* img = cvLoadImage( "logo.jpg" ); cvNamedWindow( "Test", CV_WINDOW_AUTOSIZE ); cvShowImage("Test", img); cvWaitKey(0); cvReleaseImage( &img ); cvDestroyWindow( "Test" ); return 0;} |
It is not necessary that every time you have to do this setting in visual studio or Microsoft visual c++. You can save your property sheet and add them in your new project.
Having trouble with youtube..?? Watch on DailyMotion
You can download property sheet from below link and add them directly in your project but the condition is you have followed instruction same as i mentioned in step-1 and step-2 which are Downloading and extracting openCV and Configuring system environment variables respectively.


